Setting Up PhpStorm's PHPUnit Integration
- 7 minsPhpStorm ships with an awesome feature which seems to be under used and under appreciated - it’s PHPUnit integration! When properly configured, you can run your entire test suite or individual tests right from PhpStorm at the click of a button. I find the ability to run single tests the most useful feature, right clicking on a test method and clicking run during development makes TDD a little bit easier!
However, to get this feature to work, you’ll need to spend a bit of time setting up PhpStorm to use a remote PHP interpreter. The project I’m using to demonstrate this functionality with is built with Laravel and I’m using a Laravel Homestead Vagrant box with PHP 7.0 installed as my dev environment.
Setting Up A Remote PHP Interpreter
PhpStorm gives you the option to install a remote interpreter - this is something that I’d recommend doing instead of simply using a local PHP installation. I’m a follower of the notion that your dev environment should exactly match production, so I deploy my projects to servers which are provisioned with the same setup as my Vagrant development environment. I think the same rule should apply to your test environments too.
If you’re using a Vagrant box, the configuration is simplified slightly since PhpStorm can automatically connect to Vagrant VMs with just their directory. To find out the directory your Vagrant VM is running in, run the following command on your local machine:
# vagrant global-status
This should output a table to your console which looks similar to this:
id name provider state directory
----------------------------------------------------------------------------------------
4ff2702 default virtualbox poweroff /Users/ecs/website
1a2b3c4 default virtualbox poweroff /Users/ecs/api-docs
f812a16 default virtualbox running /Users/ecs/Homestead
The above shows information about all known Vagrant environments
on this machine. This data is cached and may not be completely
up-to-date. To interact with any of the machines, you can go to
that directory and run Vagrant, or you can use the ID directly
with Vagrant commands from any directory. For example:
"vagrant destroy 1a2b3c4"
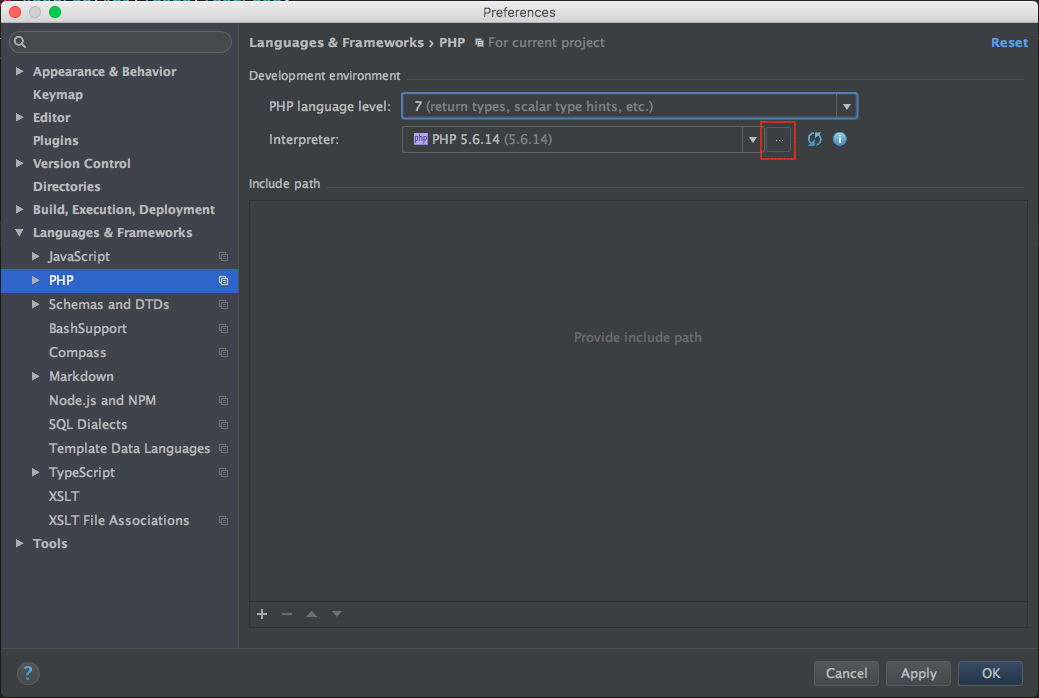
You’ll notice that I have a few Vagrant boxes setup on my machine - we’re looking for Homestead though. It’s quite easy to find since it’s stored in a directory named Homestead. Now we need to open PhpStorm and open Preferences and navigate to Languages & Frameworks ▶ PHP and select a new interpreter for our project by clicking the ellipsis next to the current setting:
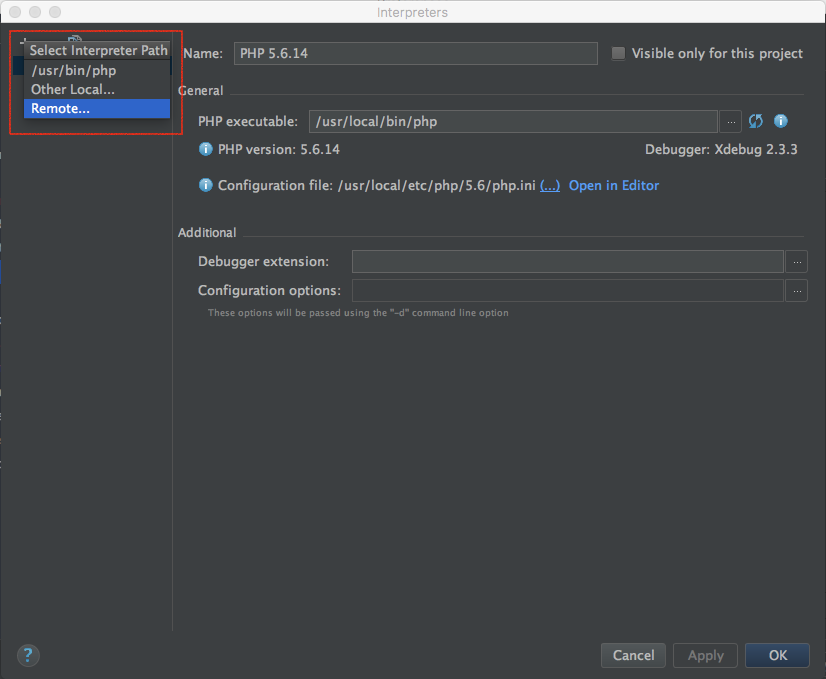
On the next window, click the ‘+’ in the top left corner of the window to add the new interpreter, you should then select ‘Remote’ from the drop-down menu which appears:
Now another window will open, select the ‘Vagrant’ option and paste in the Vagrant path which you obtained from the console earlier on. Then click OK (the PHP interpreter path is the default /usr/bin/php at the time of writing - if this changes in future, it can be obtained by running php -i on Homestead and searching for $_SERVER['_']):

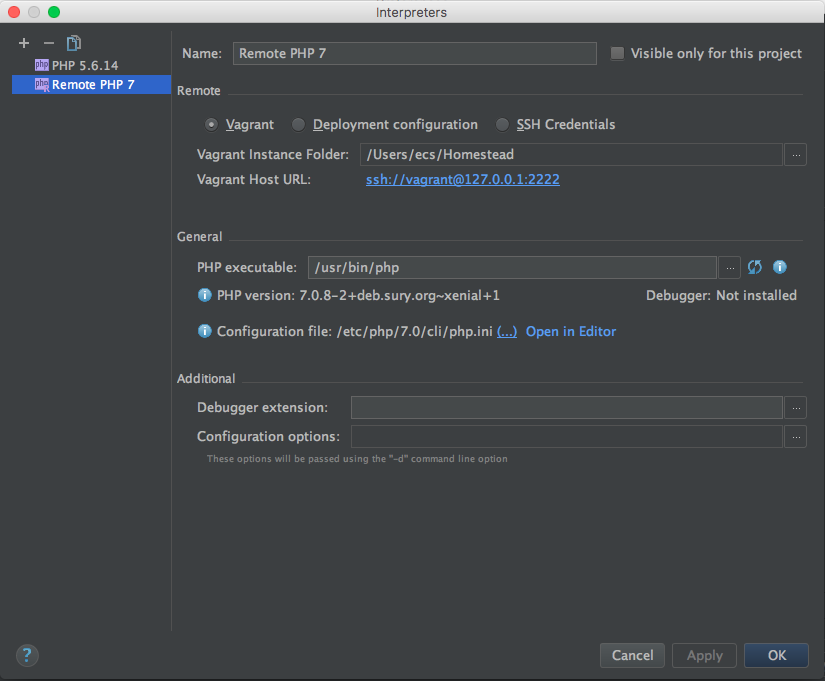
Now you should see your new ‘Remote PHP 7’ settings - double check that there are no error messages in this window. I’ve found configuring PhpStorm with Vagrant to be very reliable, Here’s what a successful setup should look like:
Running PHPUnit Tests Within PhpStorm
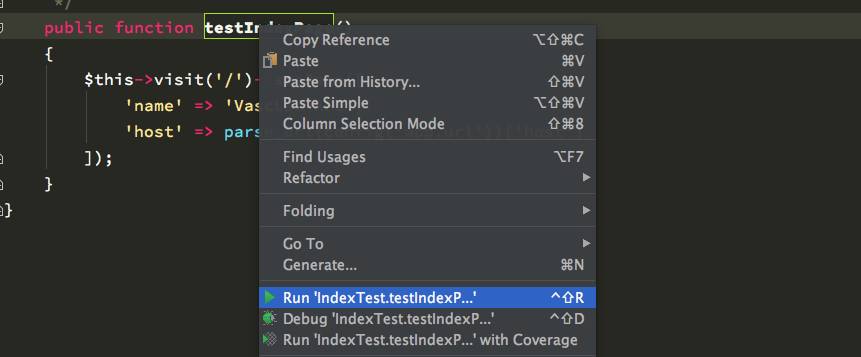
You can try running your PHPUnit tests to see if they work. You can click the ‘Run’ button at the bottom left corner of your PhpStorm window (highlighted in red), it will open the test panel up. Go ahead and press the green play icon in the top left corner of the panel (highlighted in yellow); the tests will probably fail and you should see an error notice similar to this:
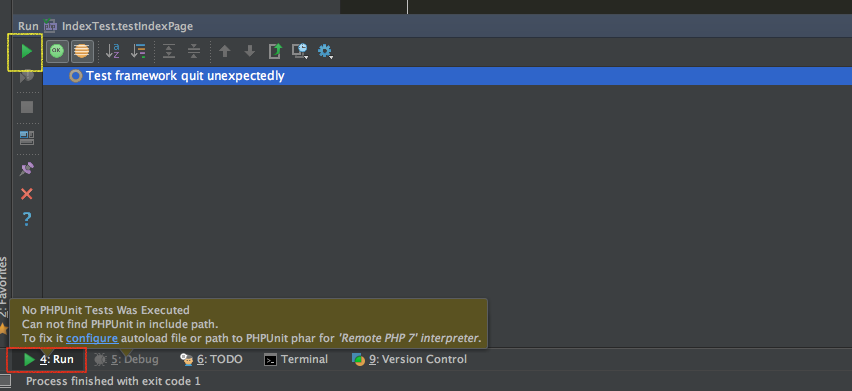
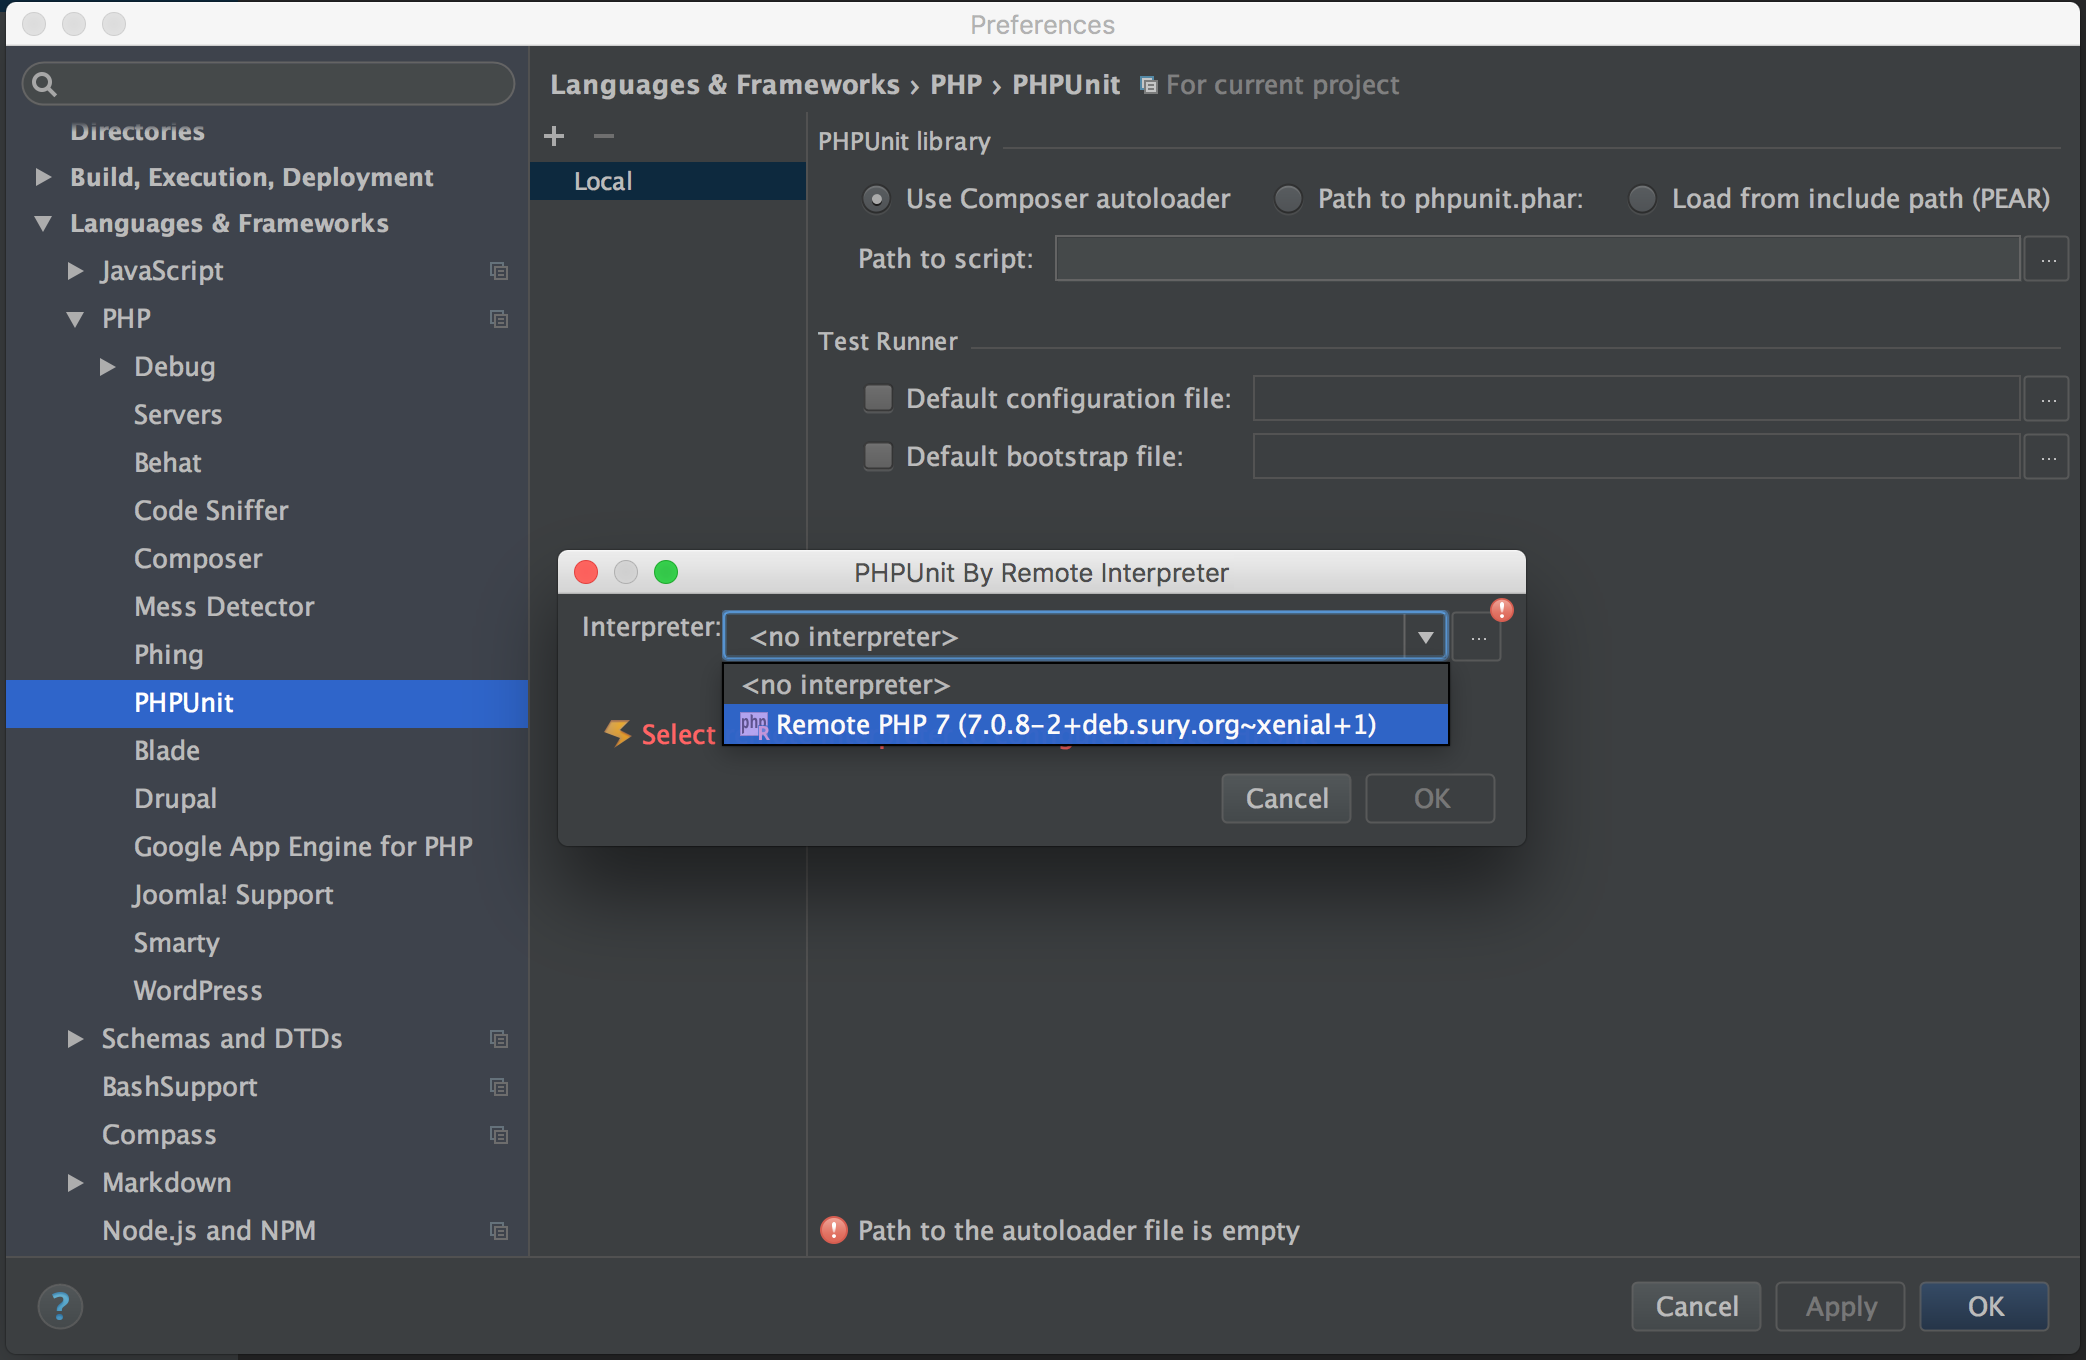
That’s because you need to configure PhpStorm further so it can make use of your remote PHP interpreter. To configure this, open Preferences and navigate to Languages & Frameworks ▶ PHP ▶ PHPUnit. You will see a window which will let you select your remote interpreter for PHPUnit testing by clicking the ‘+’ symbol in the top left corner and selecting ‘By Remote Interpreter’:

Another window will open with a drop-down will pop open where you can select the previously setup remote interpreter, go ahead and select ‘Remote PHP 7’ (or the name of your remote interpreter if you named it something else) and press OK:
The next thing to do is setup the path mappings, this lets PhpStorm know the relationship between the files on your local development machine and the files on your Vagrant box. To do this, click the ellipsis next to the path mappings input (highlighted in red):
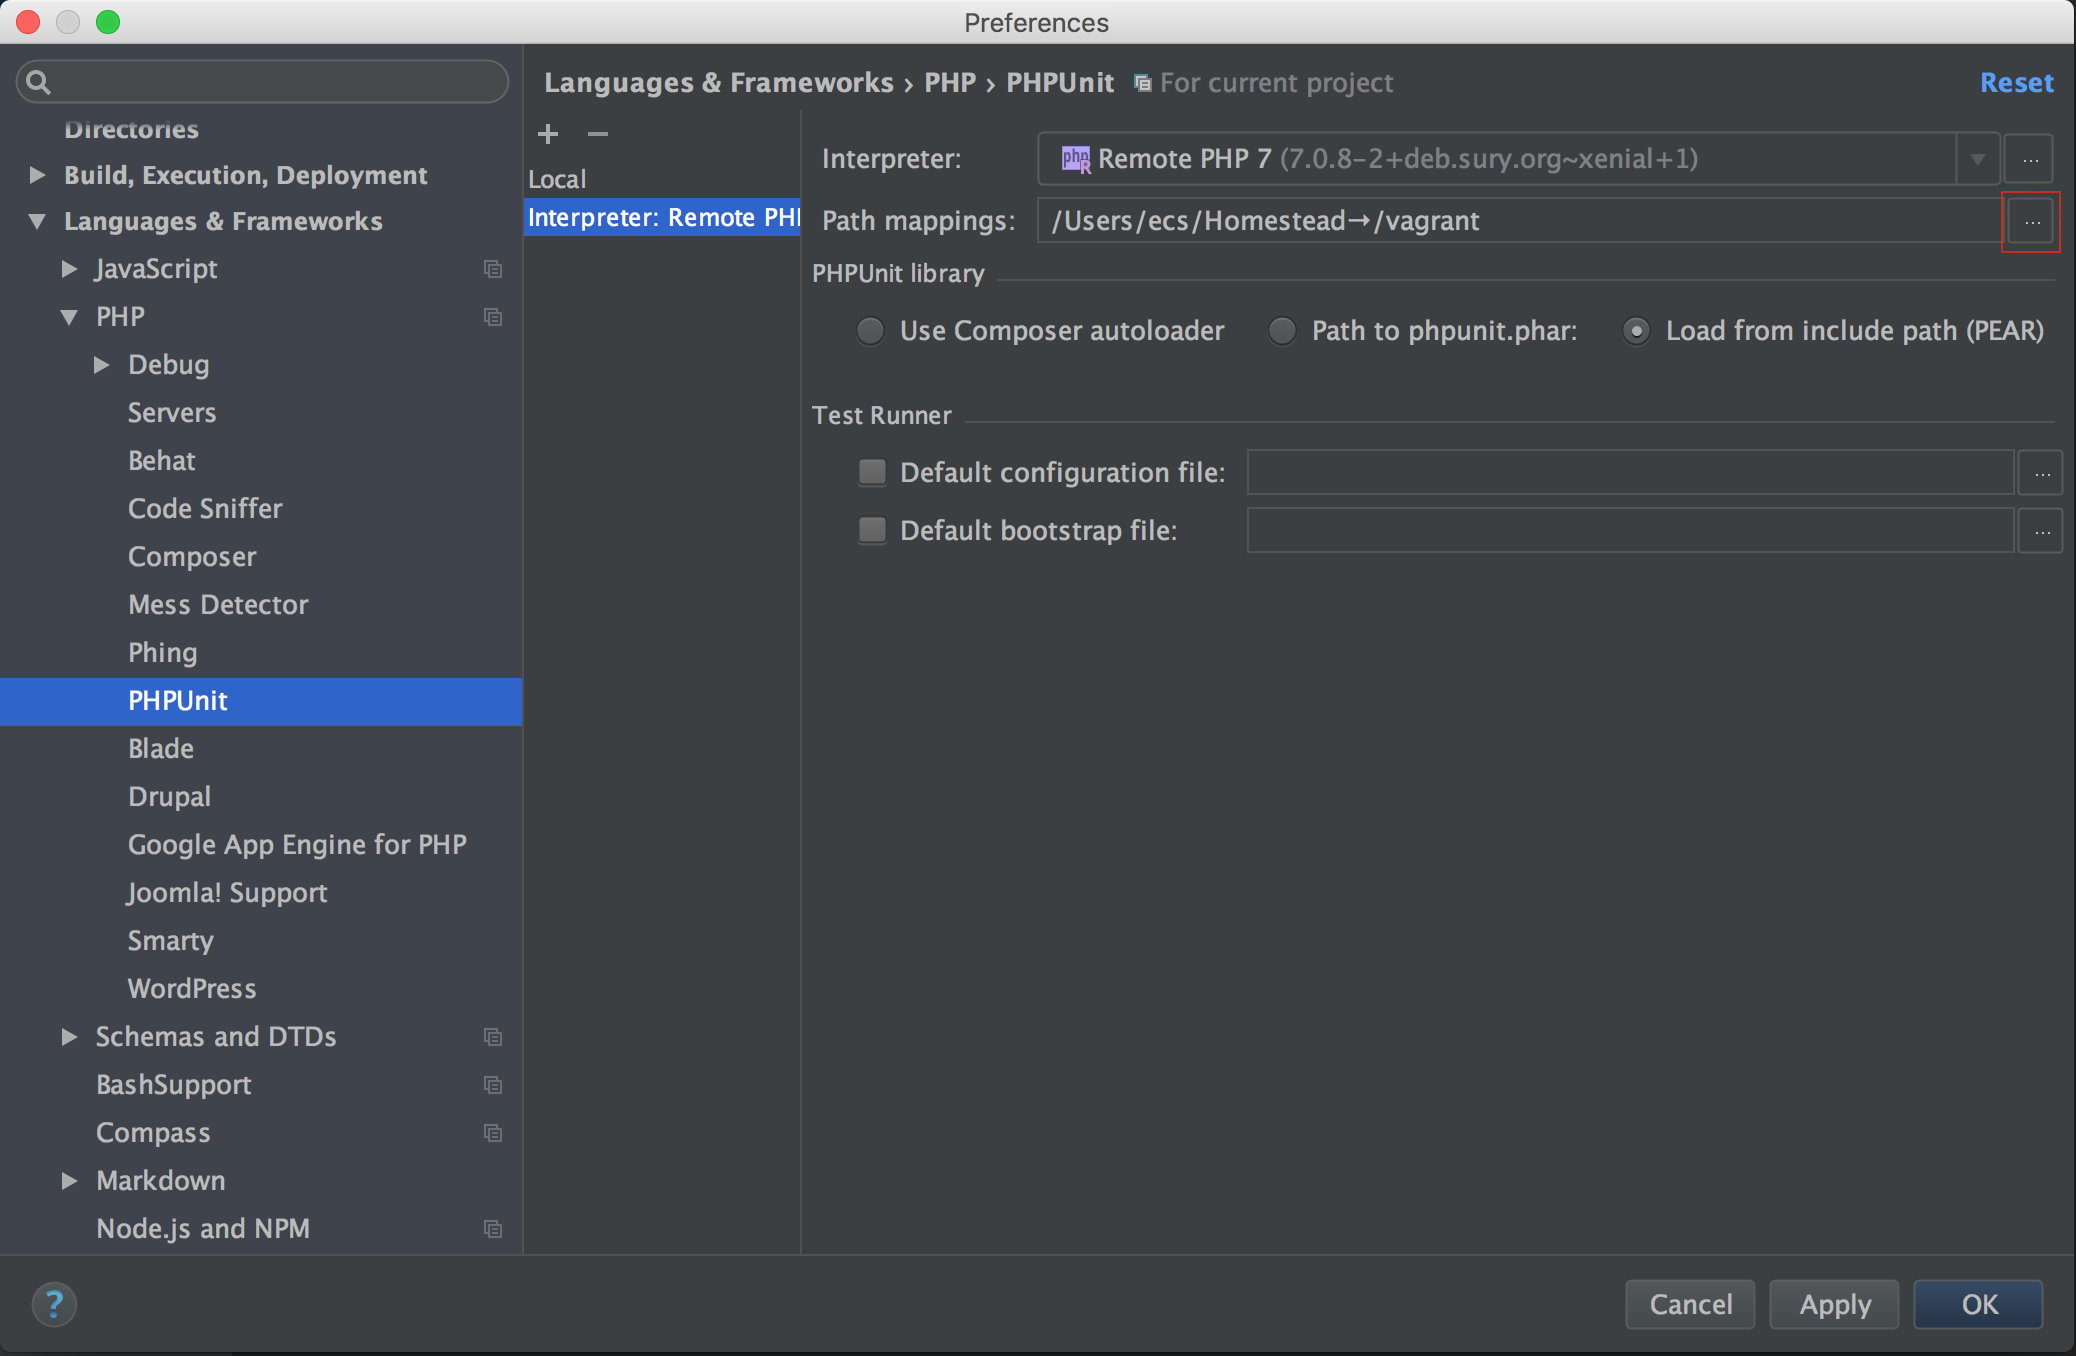
Another window will open which you can use to define the path mappings for your project. It should be sufficient to just match the local root project directory with the matching directory on your Vagrant box. Click the ‘+’ in the bottom left corner of the window (highlighted in red) and then define your local and remote paths (highlighted in orange) and press OK:

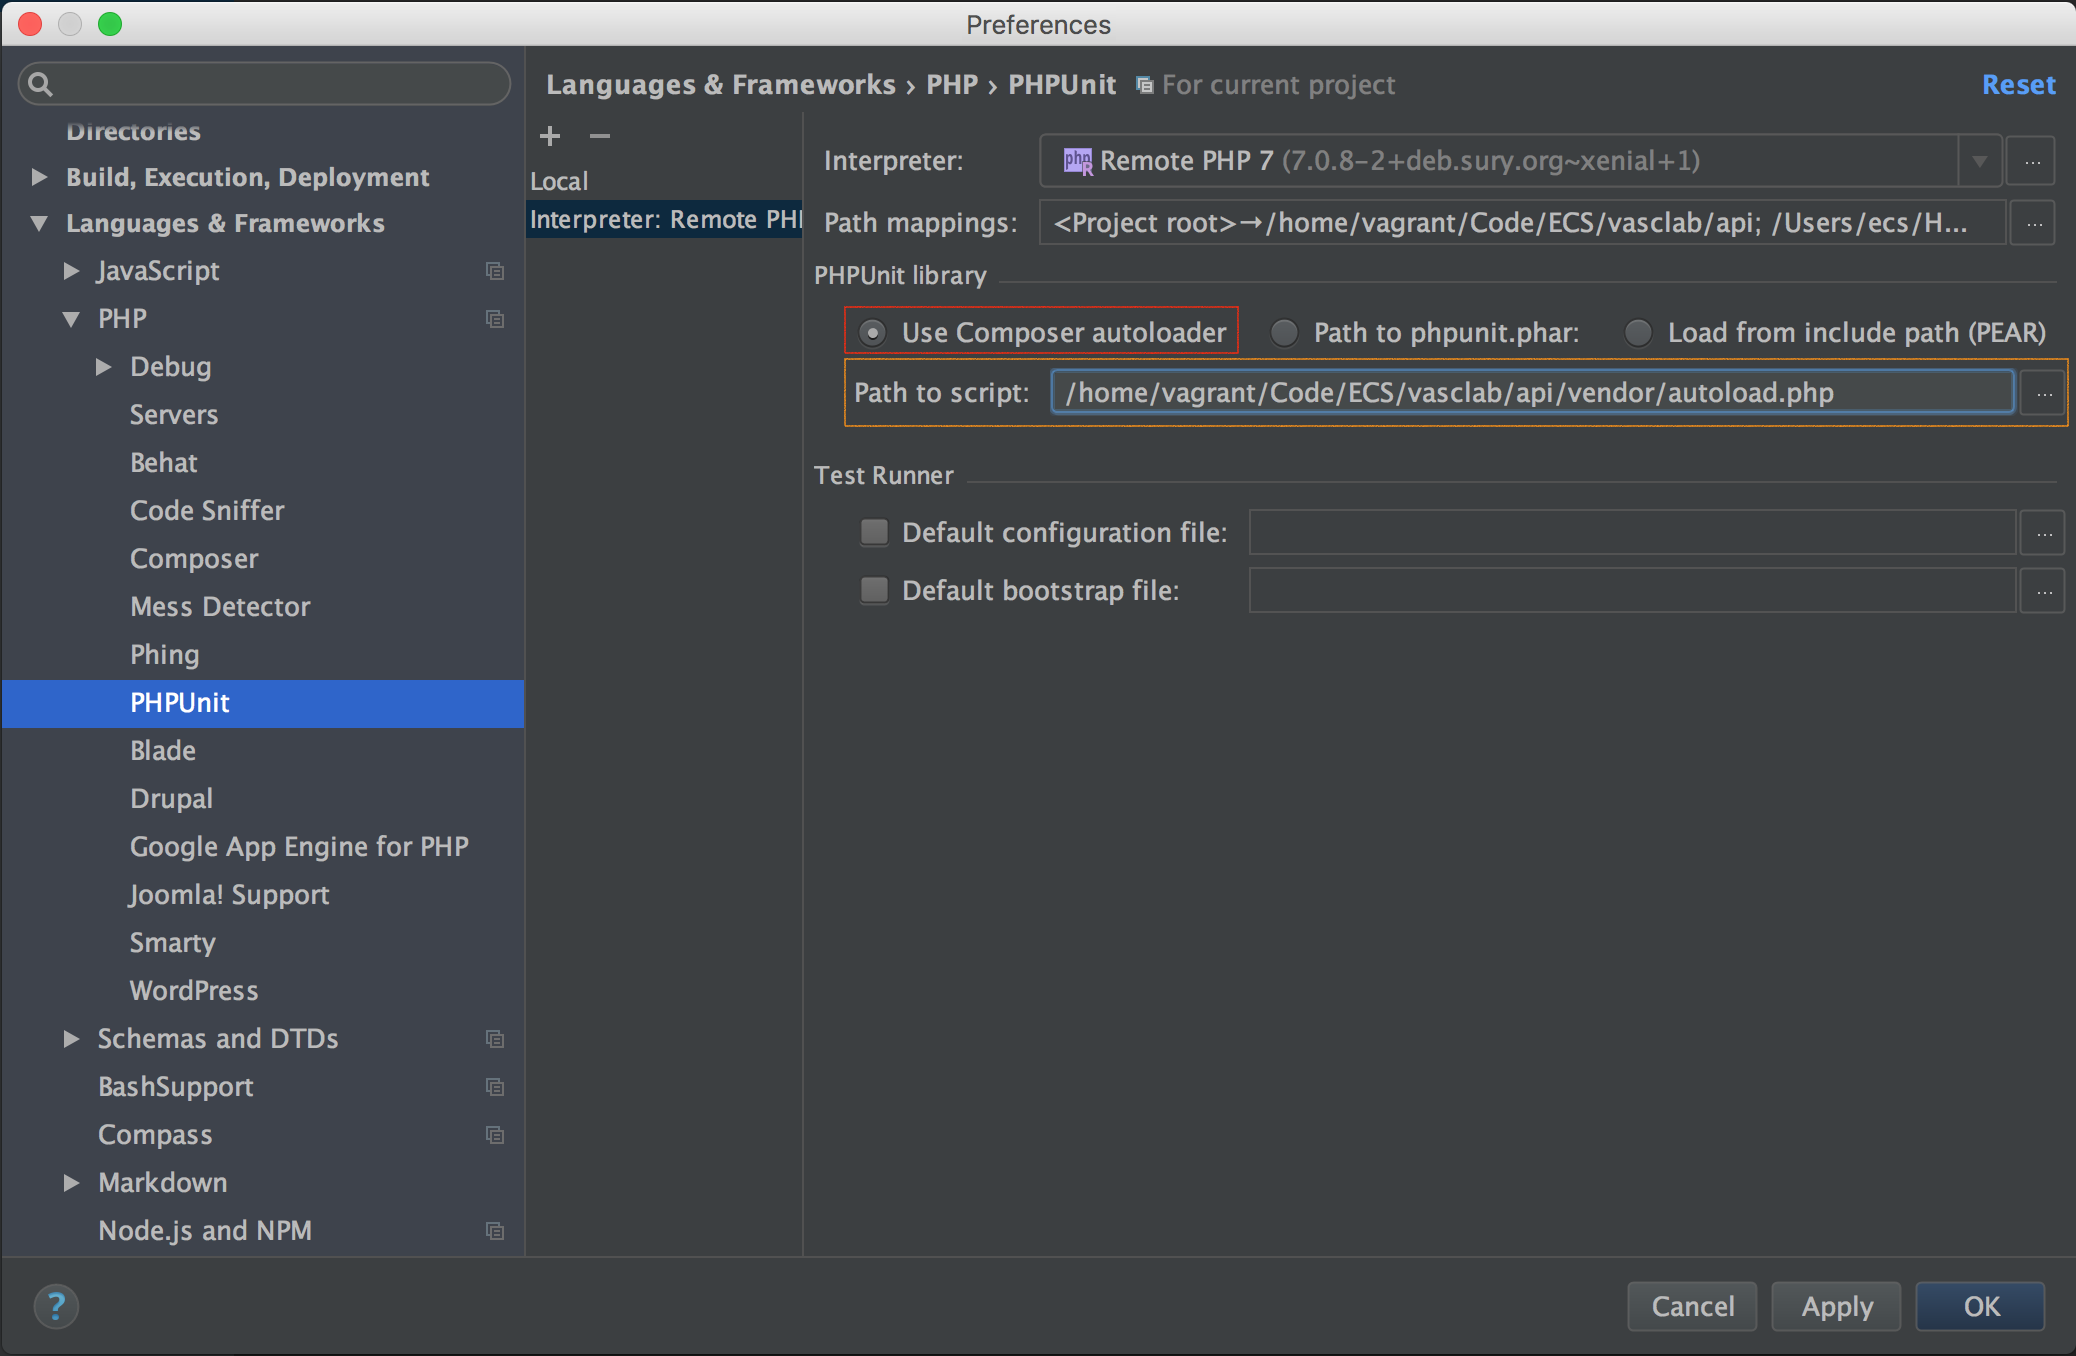
The next thing to setup is the PHPUnit autoloader. My example project is using a standard Composer autoloader, so in my example I selected ‘Use Composer autoloader’ (highlighted in red) and defined where my autoload.php file is located on my Vagrant box (this file is generally in the root of your project’s vendor directory) [highlighted in orange]. PhpStorm supports other methods of loading PHPUnit, but I’ve not tried them for myself. Either way, here’s my configuration which should suffice for most PHP projects which use Composer:
Finally, you’ll need to define where your project’s phpunit.xml configuration file is located. Select the checkbox labeled ‘Default configuration file’ (highlighted in red) then enter the location of phpunit.xml on your Vagrant box (highlighted in orange), then click apply and then OK:
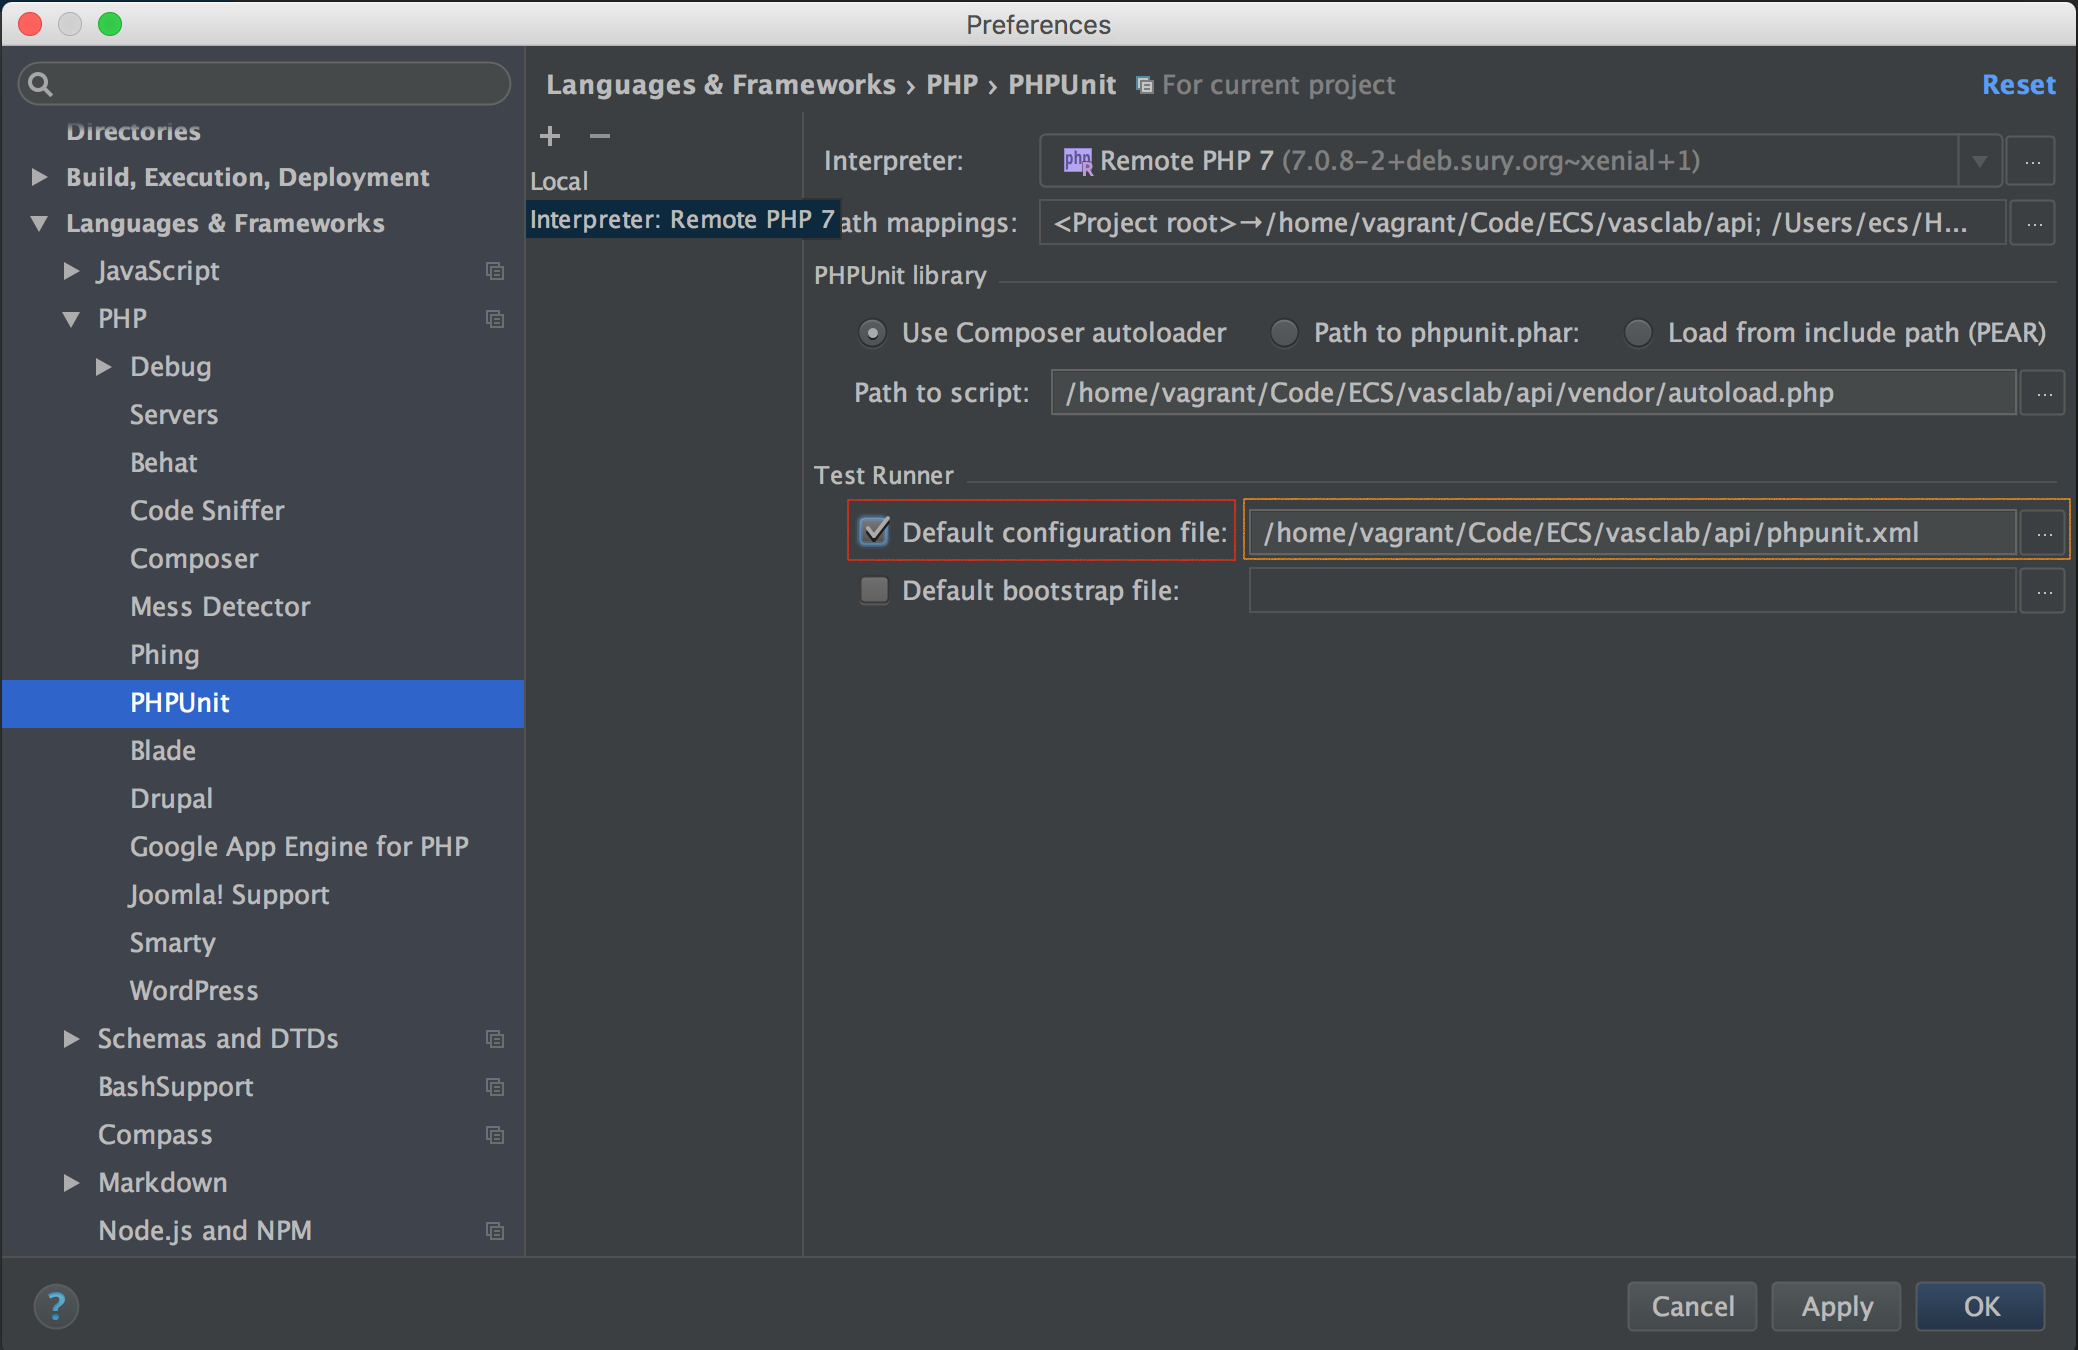
You might’ve noticed that I’ve not defined the location of my test’s bootstrap file. I define the bootstrap file in my phpunit.xml file so it’s not necessary to define it in PhpStorm too. Your configuration might vary, so bare this option in mind if you’re getting any strange autoloading errors.
Now that PhpStorm is configured to work with PHPUnit via a remote PHP interpreter, you should be able to open the test panel and click the green play icon again; however this time, your tests should run!
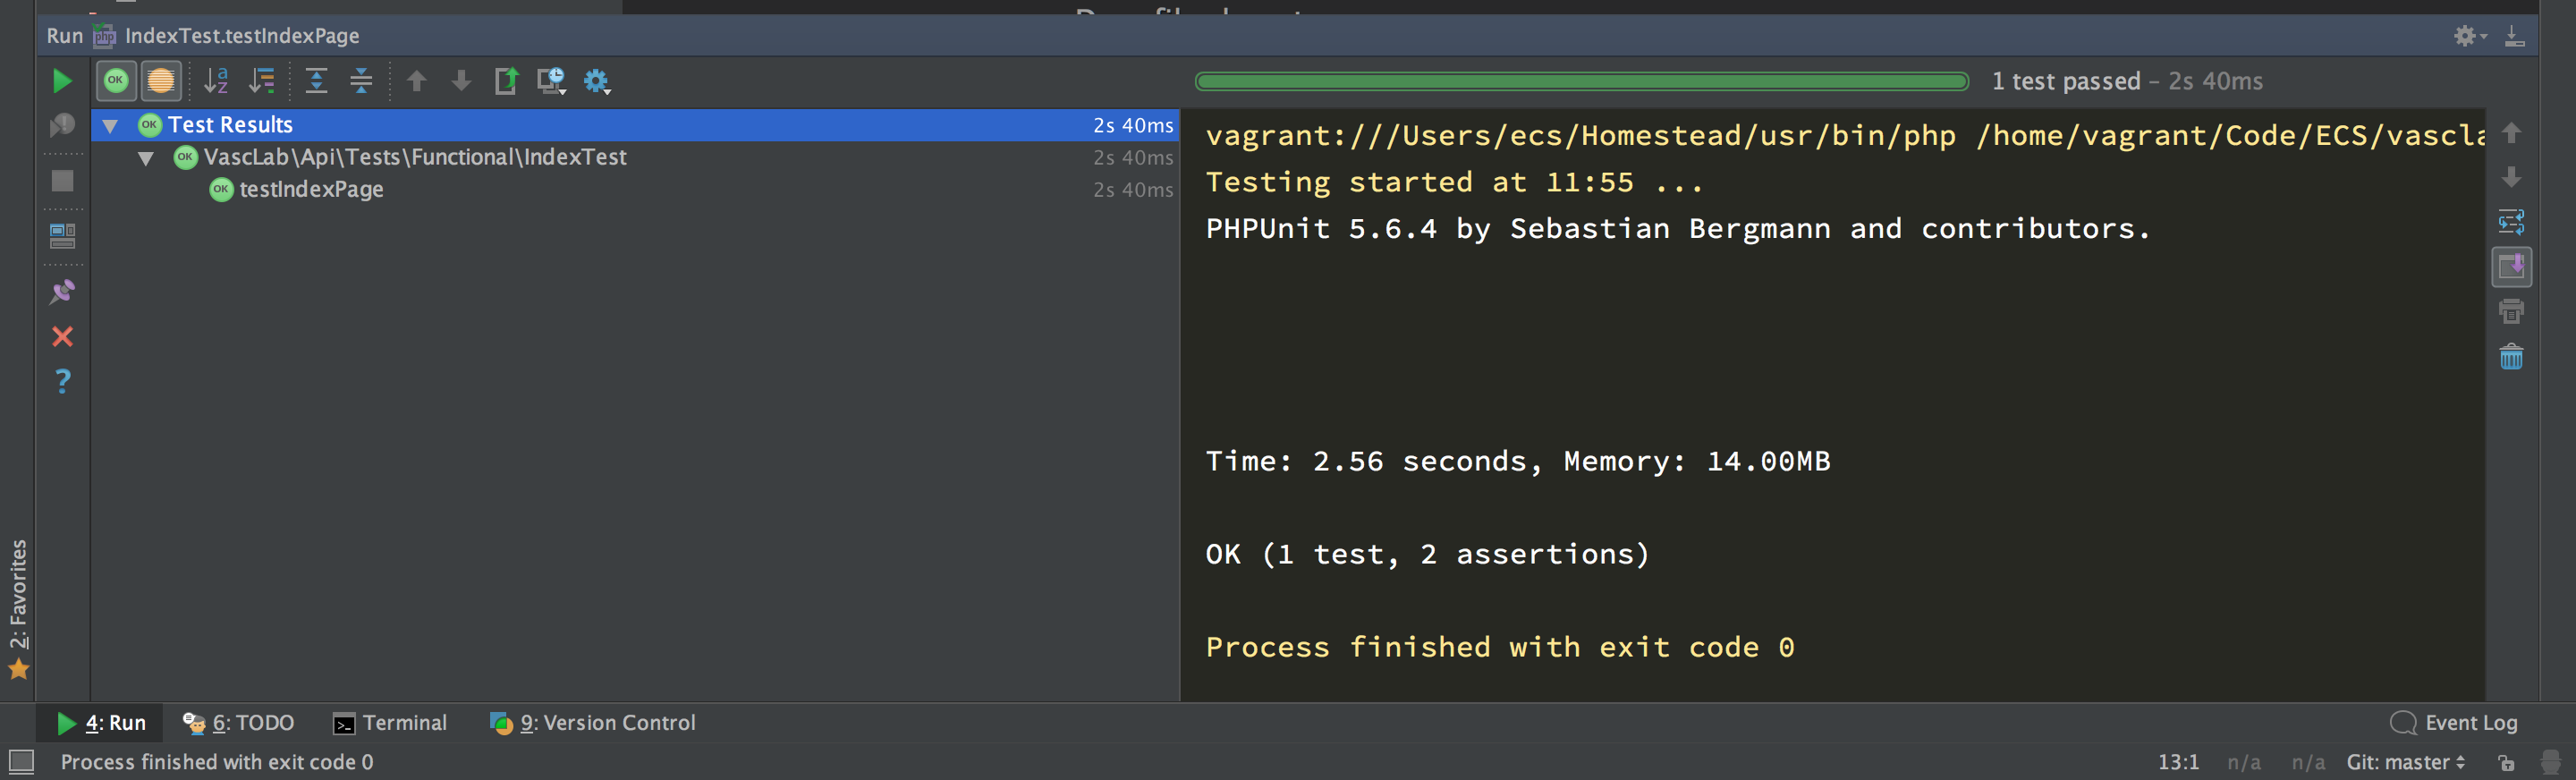
I’ve found this feature so useful! Generally while developing, I’ll need to run single tests over and over until I’ve built a new feature or squashed a bug. Before I figured out how to run PHPUnit tests in PhpStorm, I was grouping my tests and running them via the command line. This was fairly time consuming and I often committed silly @group fail type things by mistake. With the PHPUnit/PhpStorm integration setup, I just right click a test to run it all without leaving my IDE!
I hope you found this tutorial useful. If you have any issues with it, feel free to report them or fix them 

Edward Coleridge Smith
Independant Software Engineer